HaloVoice User Guide
Everything you need to know to use HaloVoice effectively
Want a deeper look at using HaloVoice as a real-time voice translator for streaming, gaming, and meetings? Explore the real-time translator page
Getting Started with HaloVoice
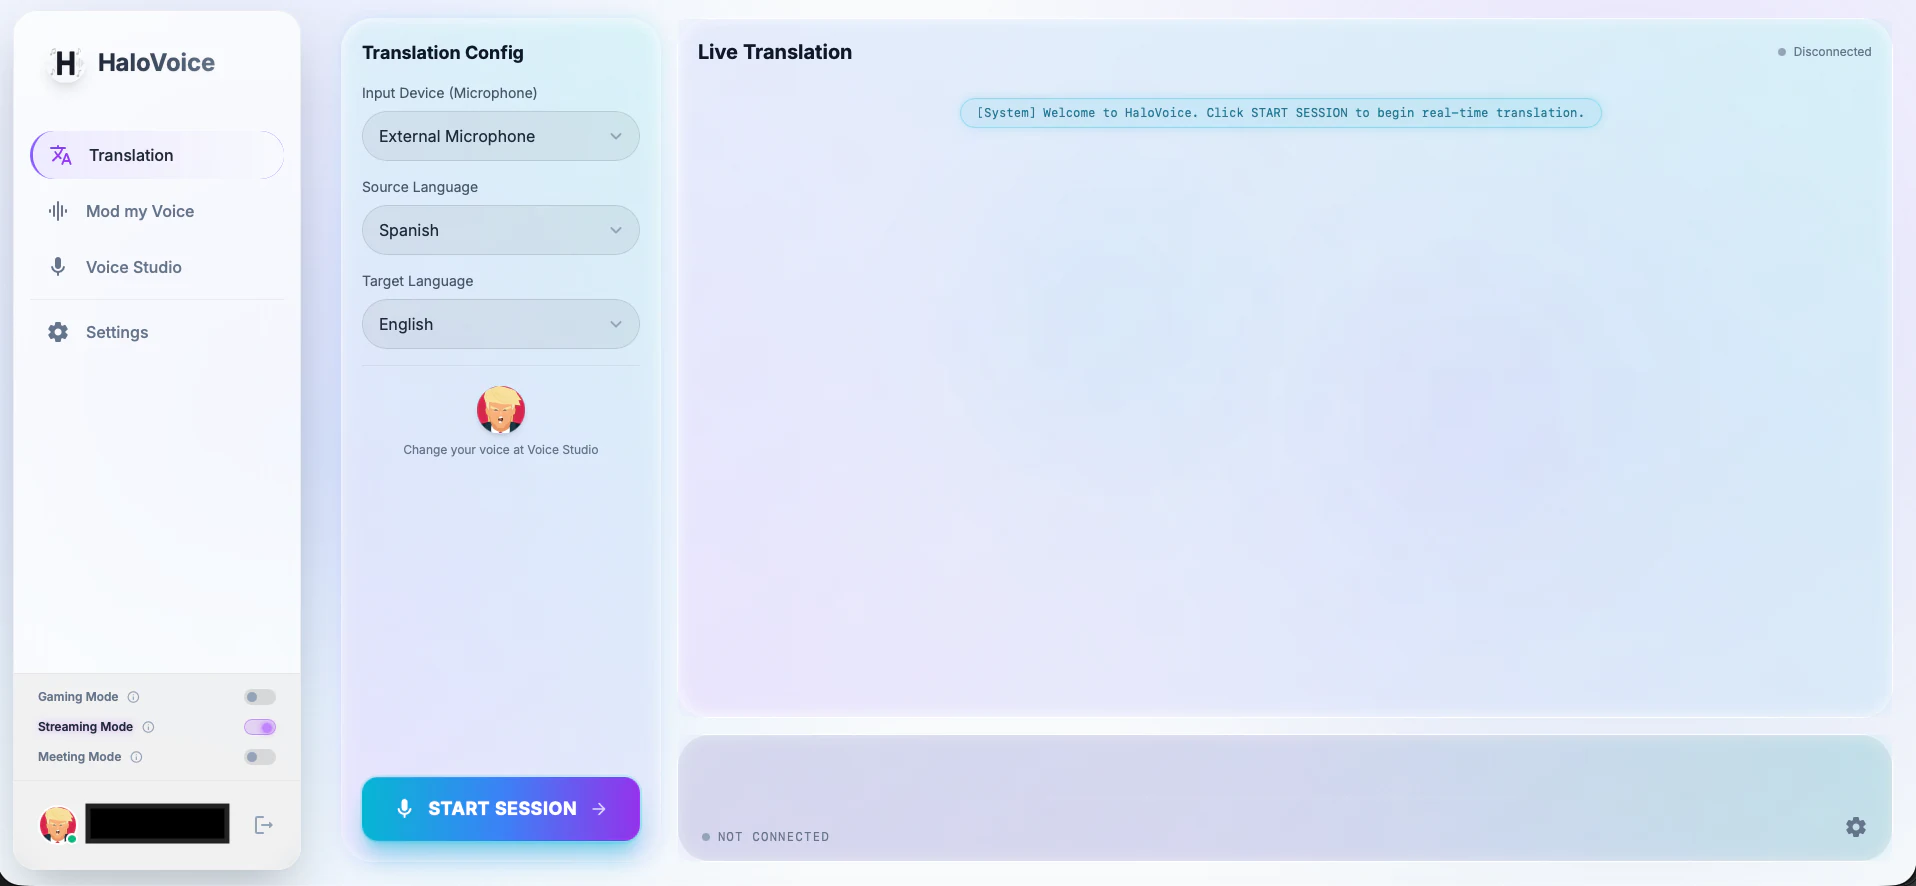
Understanding the Interface
- Input Device (Microphone): The microphone HaloVoice listens to
- Source Language: The language you'll be speaking
- Target Language: The language HaloVoice will translate to
- Start Session: Button that starts a live translation session
- Hear what others hear: Preview the translated audio sent to others
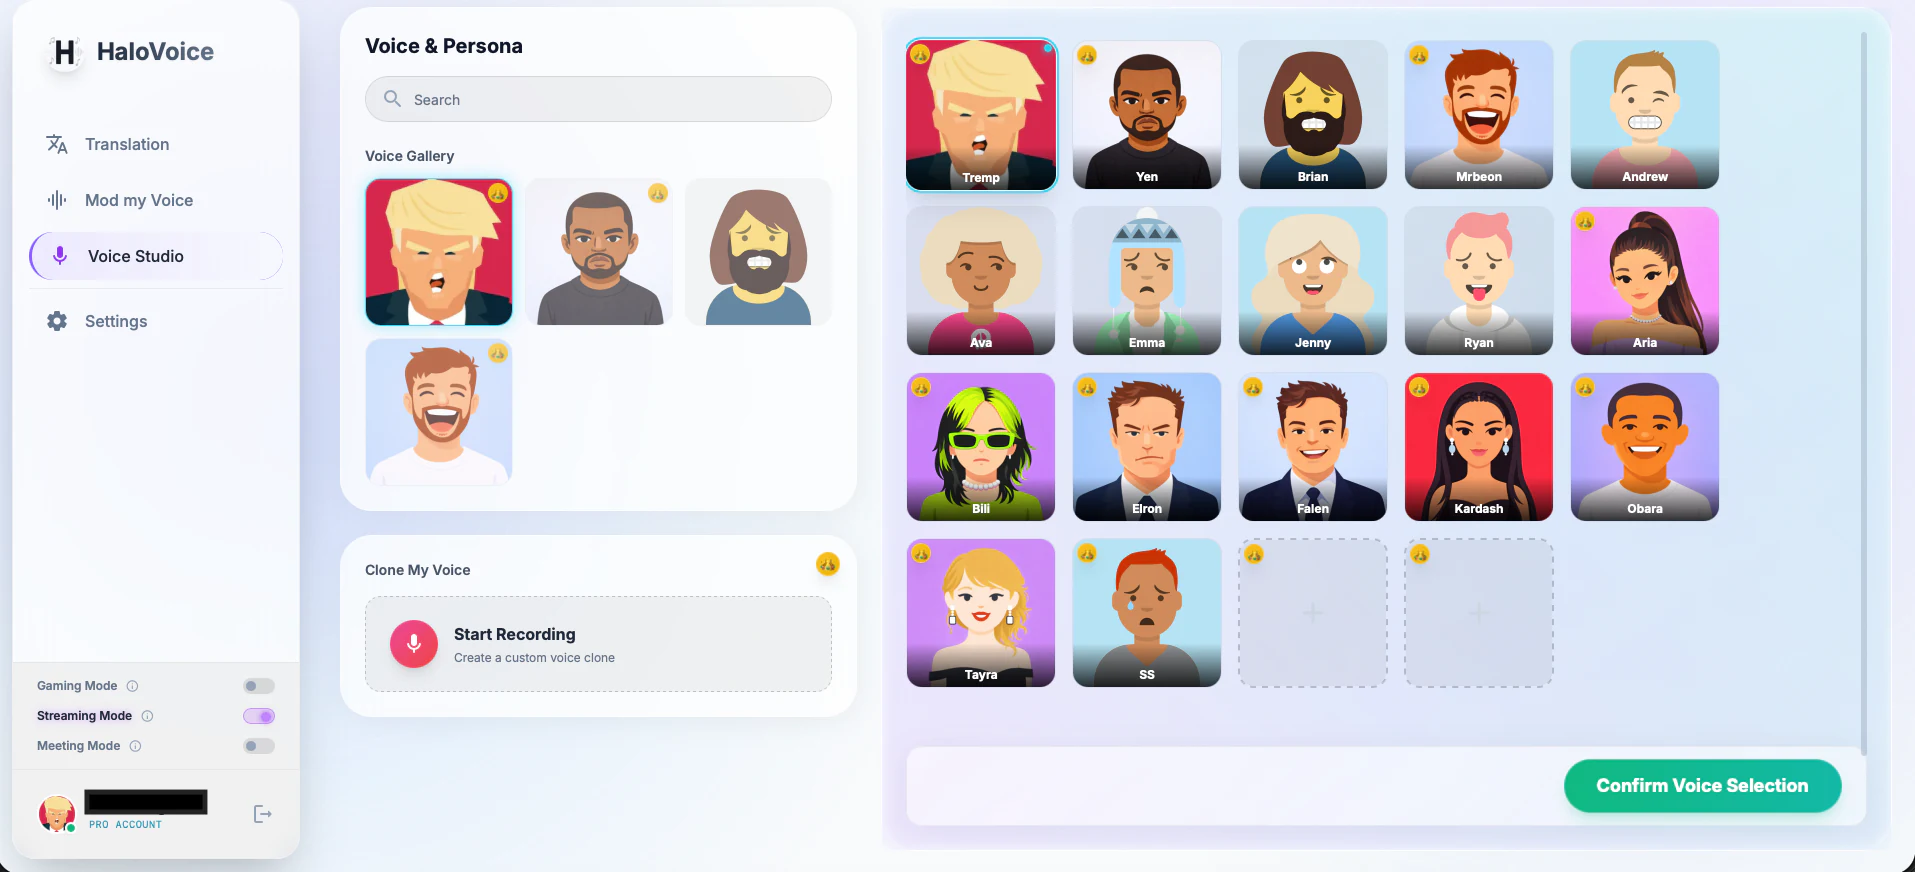
Voice Studio
You can customize your translated voice in Voice Studio. Choose from a variety of voice profiles to find the one that best represents you, or create a personalized voice clone.
Dictionary
Add the words HaloVoice should never miss, such as client names, product terms and project code names (up to 100 terms). Changes take effect from your next session.
How to Use HaloVoice
- 1Choose your microphone and source language
Pick your microphone under "Input Device (Microphone)", then click the "Source Language" dropdown and choose the language you'll be speaking.
- 2Select your target language
Click the "Target Language" dropdown and choose the language you want to translate to.
- 3Start a session
Click the "Start Session" button to begin real-time translation.
- 4Use HaloVoice in your application
Open your preferred application (OBS, Discord, Teams, Zoom, etc.) and select "HaloVoice Virtual Microphone" as the input device.
- 5Start speaking
Speak into your physical microphone and your voice will be translated in real-time.
Using with OBS Studio
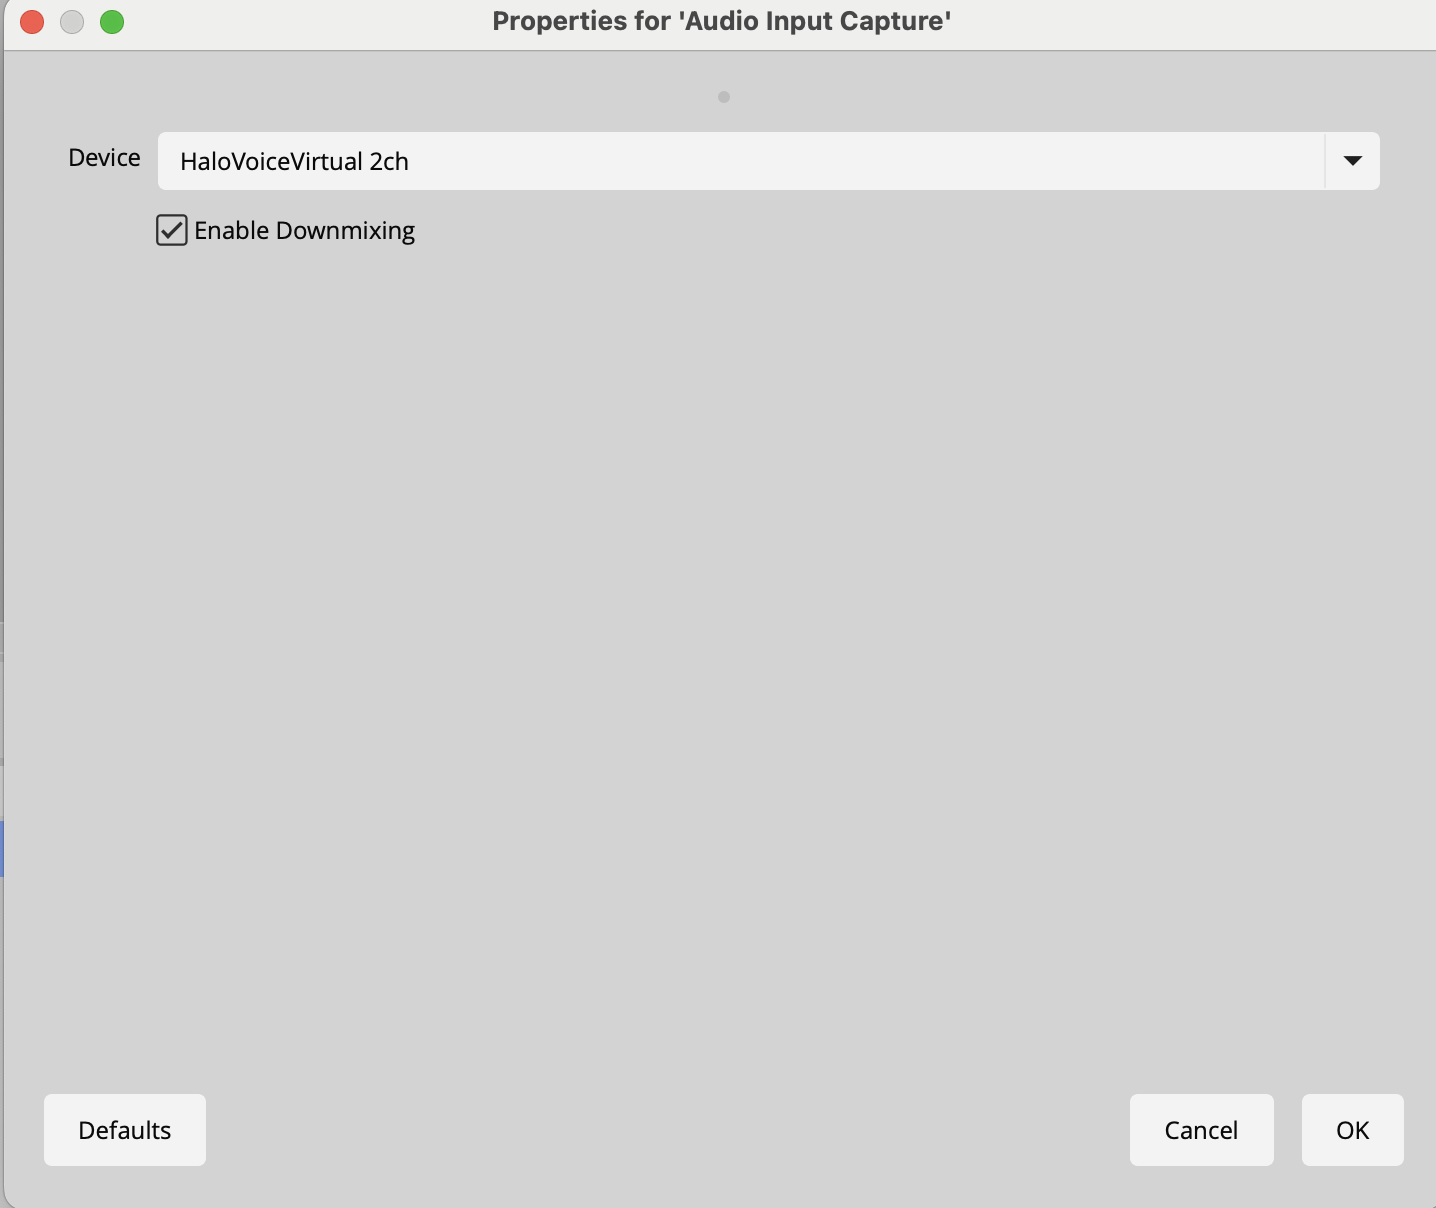
HaloVoice works seamlessly with OBS Studio for streaming with real-time voice translation.
Setup Instructions
- 1Launch HaloVoice
Start HaloVoice and select your source and target languages.
- 2Start a session
Click the "Start Session" button in HaloVoice.
- 3Launch OBS Studio
Open OBS Studio.
- 4Add audio input in OBS
In OBS, go to the Audio Mixer section at the bottom of the window. Click the "+" icon or go to Settings > Audio.
- 5Select HaloVoice Virtual Microphone
Add a new audio input capture and select "HaloVoice Virtual Microphone" from the device list.
Using with Discord
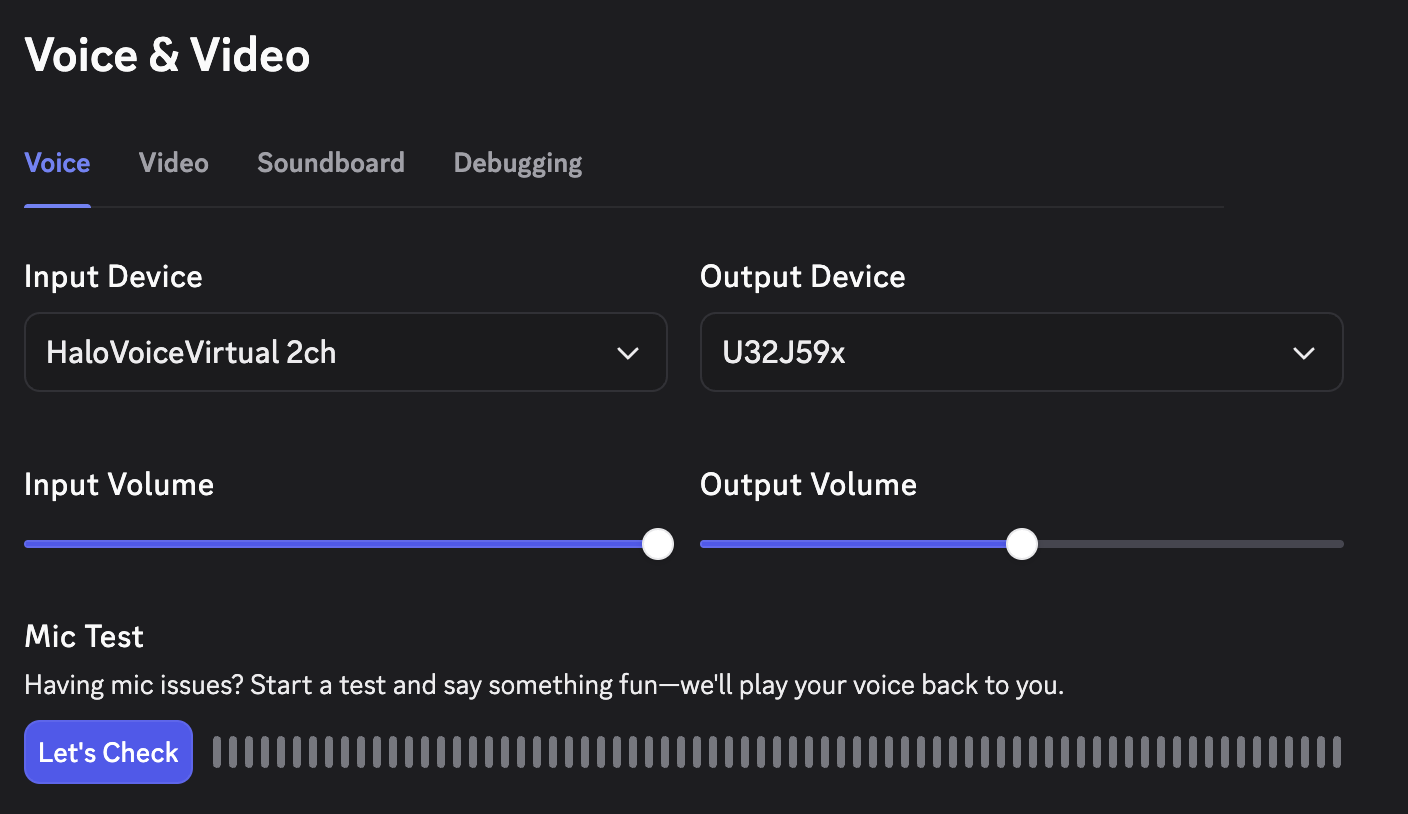
Use HaloVoice to communicate across language barriers in Discord voice channels and calls.
Setup Instructions
- 1Launch HaloVoice
Start HaloVoice and select your source and target languages.
- 2Start a session
Click the "Start Session" button in HaloVoice.
- 3Open Discord settings
In Discord, click the gear icon (User Settings) next to your username.
- 4Navigate to Voice & Video
In the left sidebar, click on "Voice & Video" under App Settings.
- 5Select HaloVoice Virtual Microphone
Under "Input Device," select "HaloVoice Virtual Microphone" from the dropdown menu.
Using with Microsoft Teams
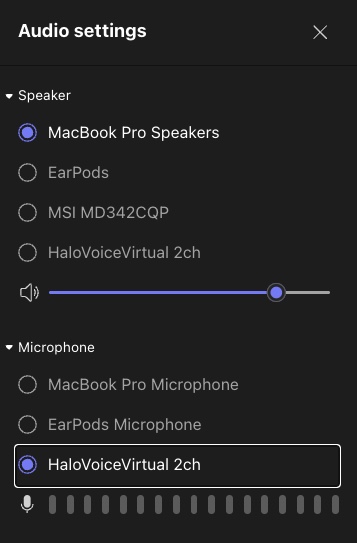
Break language barriers in professional meetings with HaloVoice and Microsoft Teams.
Setup Instructions
- 1Launch HaloVoice
Start HaloVoice and select your source and target languages.
- 2Start a session
Click the "Start Session" button in HaloVoice.
- 3Open Teams settings
In Microsoft Teams, click your profile picture in the top-right corner and select "Settings."
- 4Go to Devices
In the Settings panel, click on "Devices" in the left sidebar.
- 5Select HaloVoice Virtual Microphone
Under "Audio devices," set the Microphone to "HaloVoice Virtual Microphone".
Using with Zoom
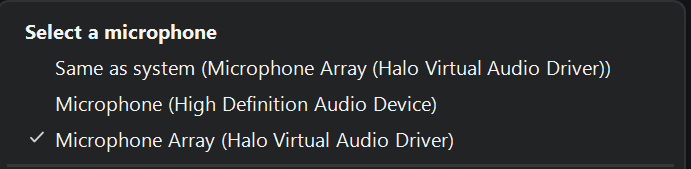
Use HaloVoice for real-time voice translation in Zoom meetings and webinars.
Setup Instructions
- 1Launch HaloVoice
Start HaloVoice and select your source and target languages.
- 2Start a session
Click the "Start Session" button in HaloVoice.
- 3Open Zoom settings
In Zoom, click the gear icon (Settings) in the top-right corner.
- 4Navigate to Audio
Click "Audio" in the left sidebar.
- 5Select HaloVoice Virtual Microphone
Under "Microphone," select "HaloVoice Virtual Microphone" from the dropdown.
Troubleshooting
Virtual Microphone Not Appearing
- Grant permissions: Make sure you grant all related permissions during installation
- Install driver during installation: Ensure the virtual audio driver was installed during the HaloVoice installation process
- Restart your computer: The virtual audio driver may need a restart to initialize properly
No Audio Output
- Check microphone selection: Make sure only the HaloVoice Virtual Microphone is selected as the input device in your application (Teams/OBS/Zoom/Discord)
- Check speaker settings: Set up your speaker/output device to be your regular speaker
- Verify HaloVoice is running: Ensure HaloVoice is open and you have clicked "Start Session"